Fotopro suction cups review and comparison
Review by Dimou Dimitris
Disclosure
These Fotopro suction cups were kindly sent to me by Fotopro in order to review and share my experience and thoughts using them as a Brand Ambassador. The company does not claim to review this article prior to its’ release and everything that follows is a totally honest review. So let’s get into it.
Intro
While photography has always been my passion, shooting video was my next step in storytelling. Video however is a whole other level of production. Although tools like Fotorpo tripods can obviously be used, more specialized tools for certain scenarios are necessary especially if you are aiming for more creative shots and high production value.
Such a scenario is shooting video inside or outside a moving vehicle. In those cases, suctions cups come in handy and allow us to use our cameras for those shots that would otherwise be impossible to get. So Fotopro is expanding its product range in order to become a solution provider for all our shooting needs, producing 3 different sizes of suction cups which have a tone of uses, that I will describe further below.

The 3 different sizes of the suction cups
First thoughts, system parts and features
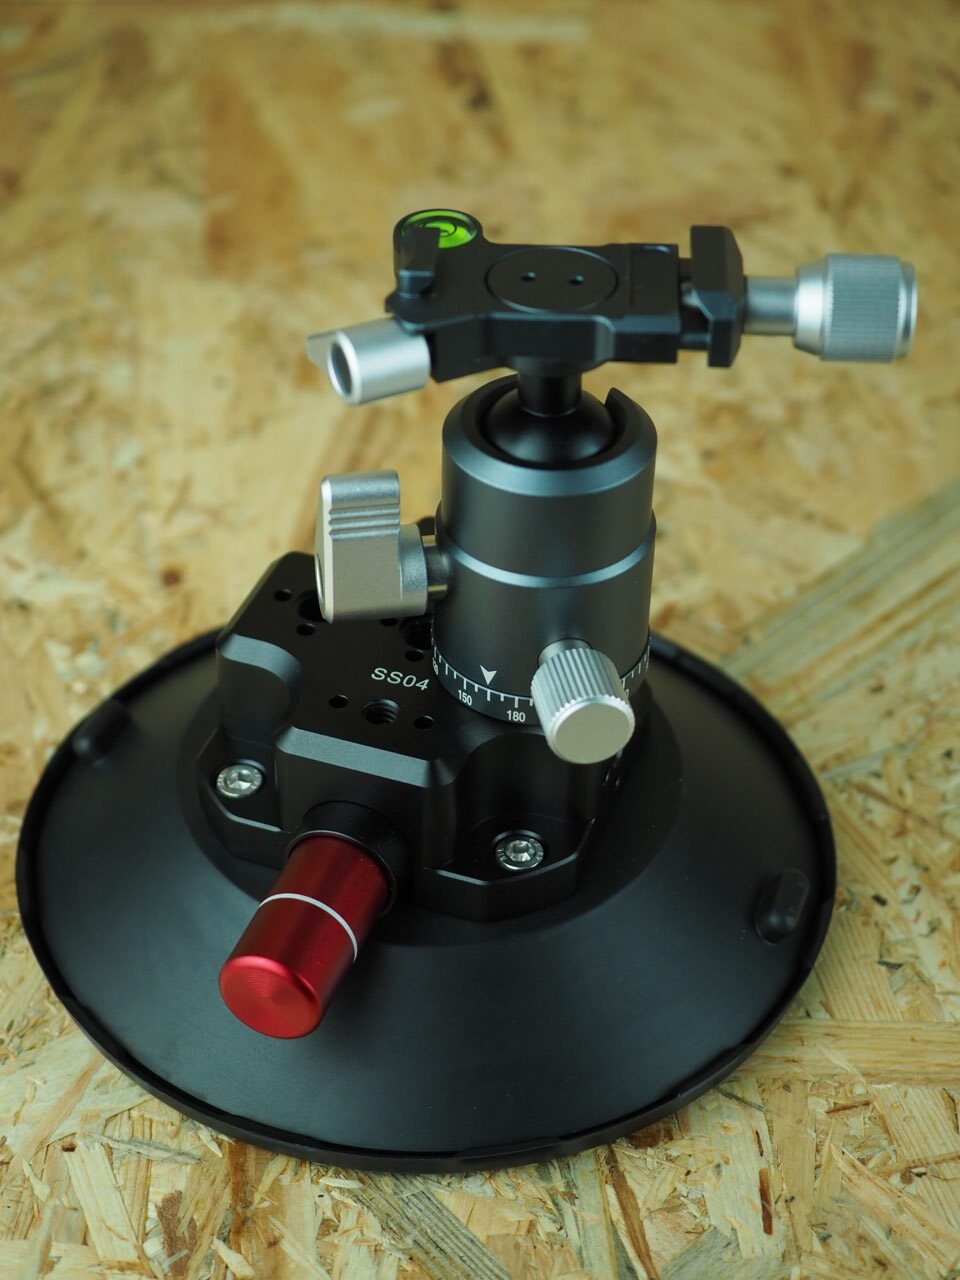
The suction cups were nicely and individually packed each on its own package. Each package contained the suction cup itself, a protective cap, a 3/8” to 1/4” adapter screw, an 1/4” hex screw, a 3/8” screw and their respective hex wrenches. Each suction cup consists of 3 main parts. The suction cup itself, the vacuum pump and the threaded metal block on which all accessories, cameras etc will be attached. The rubber is rigid, the pump shaft is aluminum as the whole threaded metal base, giving the sense of a high quality we are used to by Fotopro.
The fact that the suction cups use the common 1/4” and 3/8” threaded screws ensures that most common accessories will be adapted easily and also the existence of ARRI locking pin holes will allow their mounting also. Fotopro ensures through rigorous testing that all parts will work flawlessly, as the vacuum pump has been press tested for 100000 times and each suction cup is tested for 48 hours in order to pass the quality control. On the pump shaft itself, there is a visible white line that acts also as an indicator for the security of the connection. On each suction cup there are 2 antidiametrically placed release buttons, so to speak, that despite the great strength of the suction, make the removal a very easy process.

The all metal body construction is robust and provides ease of mind to the user
Versions and specs comparison
The suction cups come in 3 different sizes. From smaller to larger, the SS02 has a diameter of 75mm, the SS03 118mm and the SS04 148mm. We can calculate that heir respective suction cup area is 172cm2, 109cm2 and 44cm2. This means that the SS04 is 57% larger than SS03 and almost 4 times larger than SS02 and the SS03 is 150% larger than the SS02. Some of the most important specs can be seen in the table below.
| SS02 | SS03 | SS04 | |
| Diameter | 75mm | 118mm | 148mm |
| Surface area (approx.) | 172cm2 | 109cm2 | 44cm2 |
| Max load | 15kg | 30kg | 45kg |
| Max horizontal suction power | 15kg | 30kg | 60kg |
| Max vertical suction power | 10kg | 20kg | 30kg |
| Weight | 154g | 388g | 466g |
| Number of 1/4″ holes (with/without ARRI locking ability) | 6/0 | 4/4 | 4/4 |
| Number of 3/8″ holes (with/without ARRI locking ability) | 1/1 | 3/3 | 3/3 |
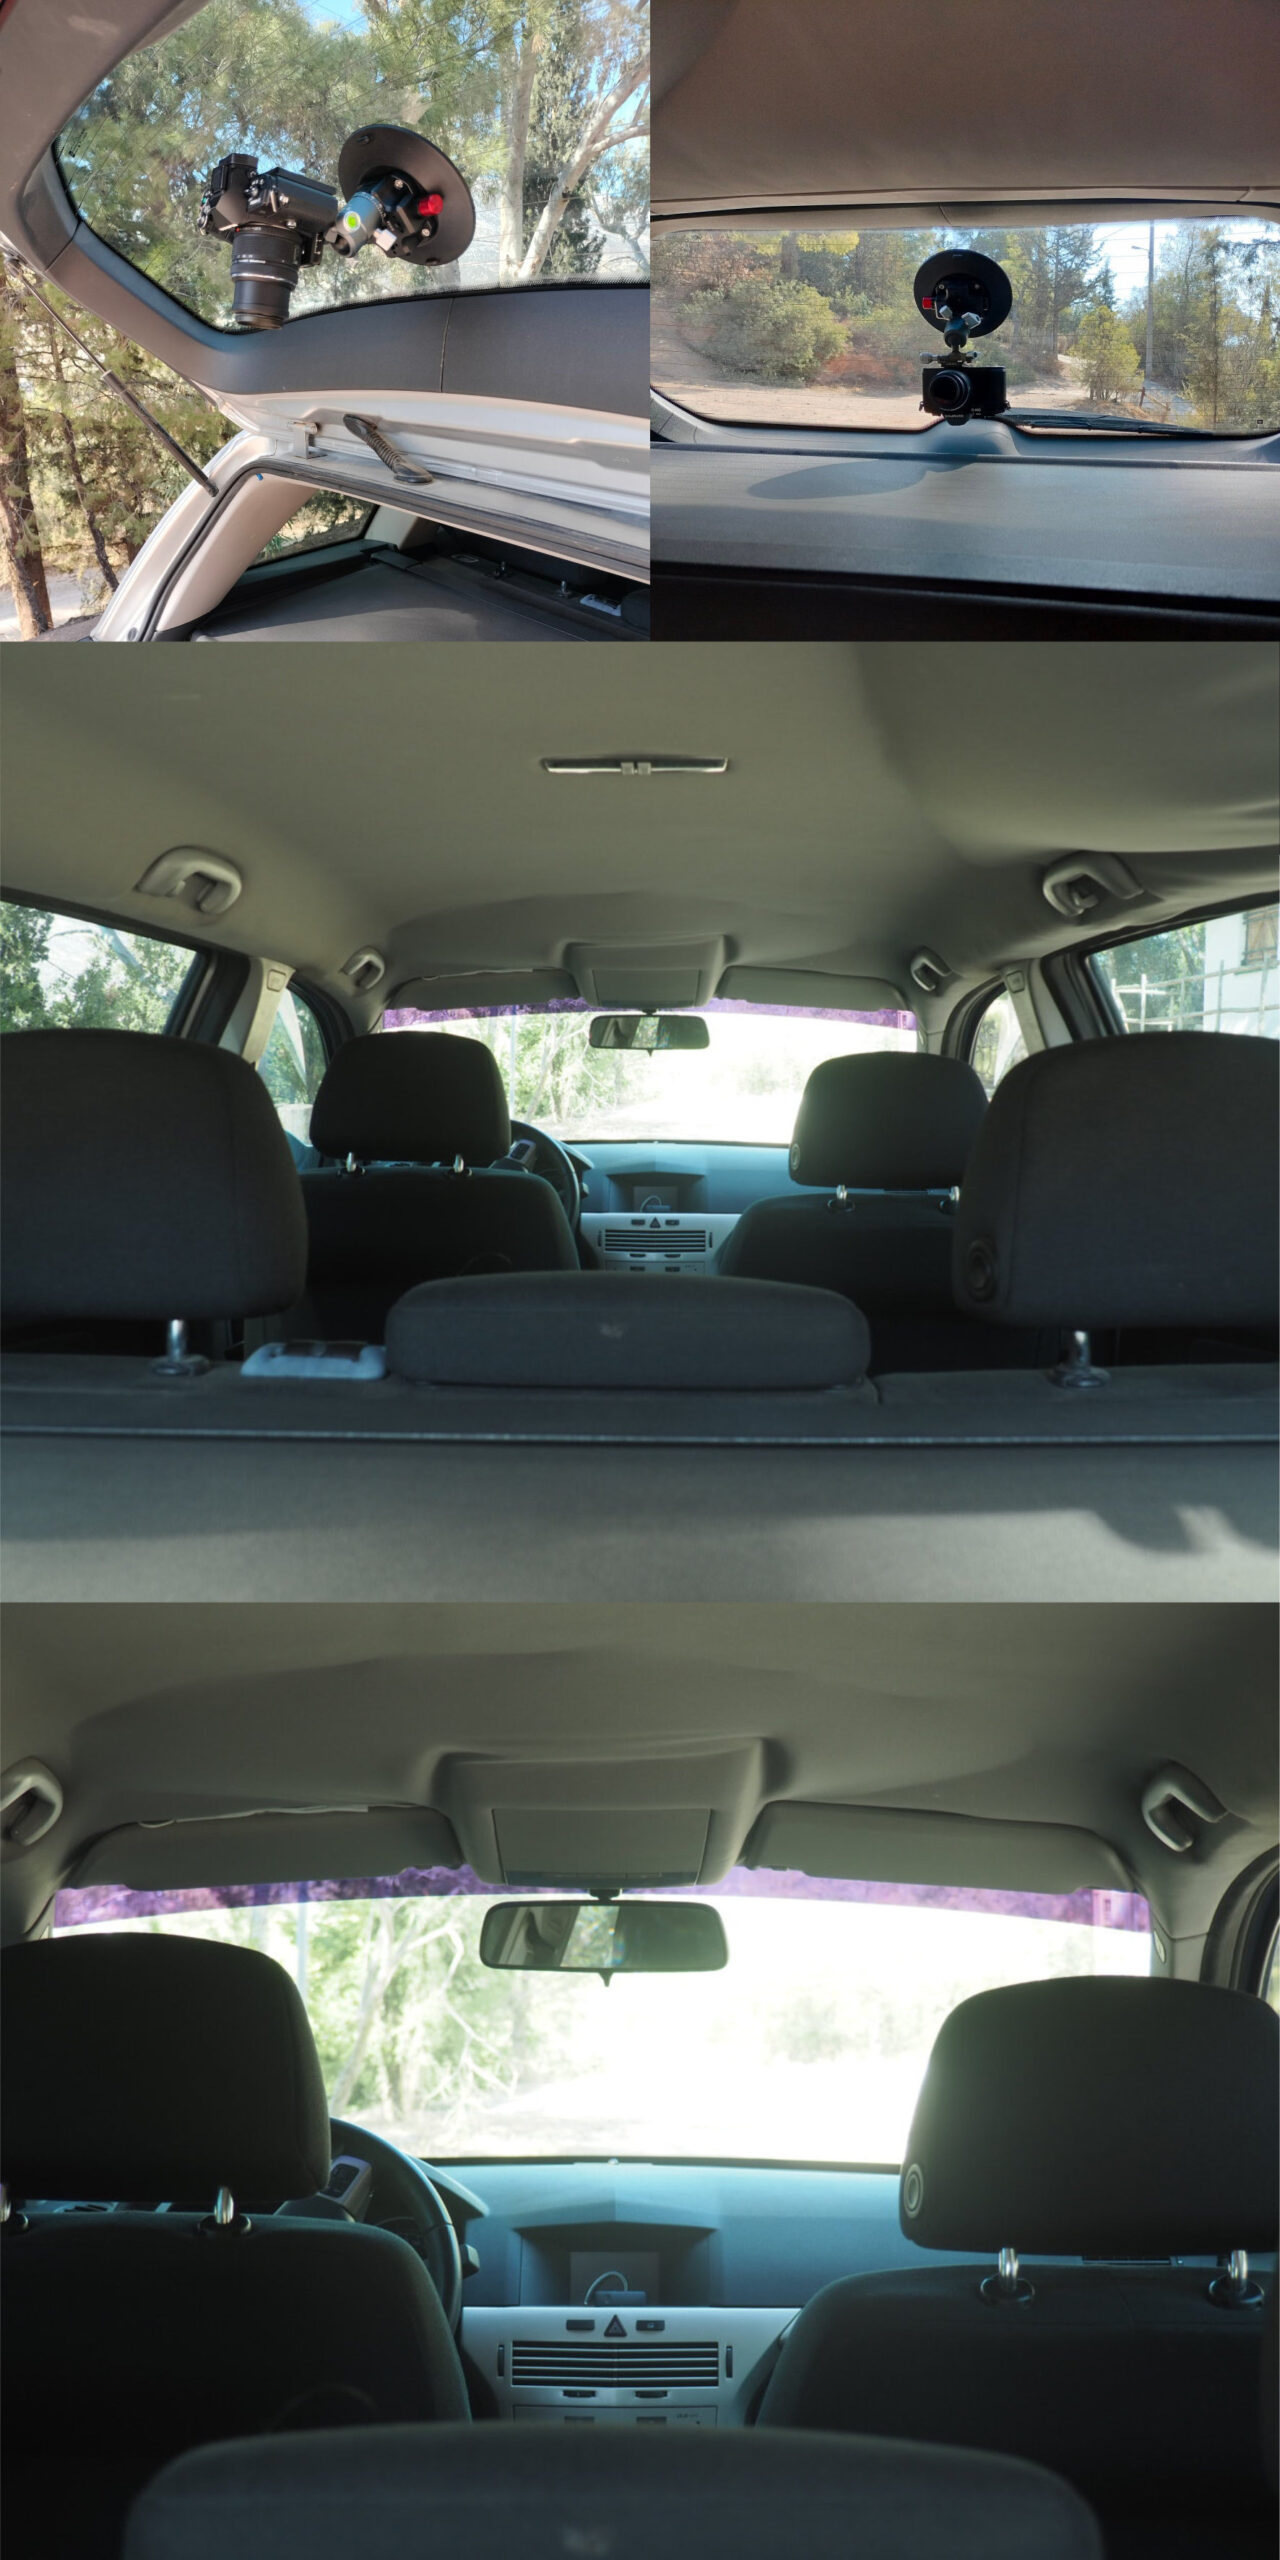
The SS04 mounted on the rear windshield and the wide and tight shot (28mm & 84mm equivalent)
In use
In the past I had no choice but to become creative with the Sherpa Max in order to shoot video in a vehicle. While it worked, it was very limiting in terms of placement options. The only real way to shoot video in a car, is either have the camera operator in it, or in case of filming yourself, to use suction cups. So I seized the opportunity to use the Fotopro SS02, SS03 and SS04 in any way possible and find out myself, how much better shots I can get.
At this point let me mention that all descriptions and techniques below, were my own actions and are not instructions for use. As your gear weight, weather conditions and other factors might be different from those I was operating in, you should always care for your gear and seek for professional help for mounting such equipment to vehicles, as I cannot be held accountable for damaging your equipment.
First of all let me describe my process of preparing the surface for attaching the suction cups. This is nothing fancy, but proved to work just fine. I started by wiping the area of choice with a dry piece of cloth. I used a microfiber towel. Then I would lightly wet it and squeeze any excess water and repeat the wiping process in order to remove even the smallest dust particles. Lastly I would apply pure alcohol (without any glycerine) on a paper towel and wipe again the same spot. That last application of alcohol will further remove any remaining dust particles and also help any moisture left on the prepped surface to be evaporated, leaving a perfectly dry area for the suction cup to be attached.
At first I had to get over the anxiety of placing my gear on the suction cups. To do so I started big, with the SS04 at first and worked my way down all the way to the SS02. They all provide a safe grip but it is a process you have to get used to at the beginning. The vacuum pump works very smooth and easily on all cups. As the pump is identical on all 3 different size cups, you will obviously need to pump more when using the SS04 than the SS02, as there is more volume to vacuum on the former than the latter. The more I pumped the more the pump shaft retracted in the pump body. By the time the white indicator line was hidden, the suction cup was secured. In all my use cases, I had never seen the line appearing back out, meaning that the cup was secure during the shoot. In order to break the seal, you just have to push the 2 little bumps on the sides of the cups and they are instantly released. This can be performed even with a single hand, leaving the other hand free for supporting the mounted gear, if you haven’t remove it already.

Mounted on a back seat window can hold a smartphone during a long and boring travel.
I started experimenting by placing the suction cups all around my car and it was way too fun to be able to place the camera in almost unlimited spots. In the interior you are limited in placing them on all the glass elements. The exterior combines that same ability in addition to the body of the car, especially the hood and the car doors. The hood can provide a great place for capturing shots of the driver and the passenger, from wide all the way to closeup. The passengers in the back seat, is harder to be filmed, but not impossible though. In all case, keep in might that the slight curvature of the windshield or hood, isn’t a problem for the suction cups and they all managed to be placed securely.
The most common way to mount a camera to a suction cup though is by using some extra accessories. You could technically mount a camera directly to the aluminum block, but you will not be able to make angle adjustments in order to point the camera at the preferred direction. The most common accessories you could use are a ballhead and magic arms. In case you are using your phone as your camera, a phone holder is also necessary. In my case I used the FPH-42QR ballhead that came with the Fotopro X-Aircross 3. I wanted a way to mount my mirrorless cameras with their ARCA-SWISS plates mounted as the ballhead is better for heavier gear and allow for adjustments on the fly. The magic arms are equally easy to adjust, but are oriented towards lighter gear. I found them to be a better solution not only for action cameras and mobile phones but also for other equipment like voice recorders, mics, lights etc.

When in need for navigating with the help of the suction cup, the SS03 has you covered.
One might thing that all you need is one suction cup to get the job done and you are basically right. But as they say, one is none and two is one. I mention that because you should always think the worst case scenario when working with moving vehicles and that is a camera to become loose and fall of the mounting hardware that previously was holding it in place. One way to approach this is by using 2 suction cups to mount a single camera. As long as you have 2 mounting points on a camera you can do that and if not, a camera cage could help. As it will provide many of them, you would effectively split the weight of the camera setup to 2 suction cups ensuring a safer mounting application. Another way of approaching a safer mounting, is to attach your camera to a single suction cup, but having another alongside the primary one and secure the camera on it too by other means, like a wire rope. With that setup, if something becomes loose and the camera falls of its suction cup, the secondary one, will provide a safety net so to speak. In that case your expensive gear will not fall to the ground with the speed of the vehicle, but it will be highly likely to be held by that secondary cup.
The key here is tightness. Any moving platform will have all kinds of vibrations on all 3 axes. If there are loose connections, vibrations will cause them to further loosen, jeopardizing the security of your gear. For larger setups, there are dedicated shock absorbers but this is something beyond the scope of this article. For our smaller setups however, we can add one or two things in order to make them even more secure. First of all we can apply thread lock on the screws we are using. That way even if there are vibrations, the screw will not start to get loose. This is not something that will prevent it from getting unscrewed with thee supplied hex wrench, but it provides enough friction to stay in place. We could also insert a rubber gasket or shim, or even a simple O-ring between the aluminum base of the suction cup and the ballhead. Magic arms have rubber pads already installed on both ends. That way there will be enough tension between the ballhead base and the suction cup base, preventing them to move apart. Lastly if you are going to secure a camera to a second suction cup, make it by tightening the rope without having any slack, as this will stabilize the setup a bit more, but also if it falls of it will has the shortest fall possible.

When mounted on the hood, taking shots of the driver is made simple.
When you want to create more immersive shots, the great step up is using an interchangeable lens camera, rather than an action camera or a phone. Although these 2 are easier to mount due to their light weight, as camera gives you more control over the manual shooting settings. Also the ability to change lenses will give you different perspectives even without moving the suction cup. I found myself using both zooms and primes depending on the situation. Whenever I had a framing that satisfied me, I used primes and whenever I was unsure of the framing I went with zooms in order to be able to change the focal length easily. Another big plus is the fact that you are able to mount filters on the lenses. Having a variable ND for for darkening the shot, will allow for exposing properly and setting the aperture exactly where you want it to be. You can also expose for the desired fps, achieving the preferred motion blur. Also a CPL filter will come in handy, when trying to eliminate that windshield glare when filming from the exterior of the car.
While trying different framing options, all I had in mind was easily achieved. I worked my way from wide to closeups and got excited by the shots I managed to capture. I tried a wide, kind of dashcam perspective and it worked great. The rear view mirror was a bit annoying but mounting the suction cup a bit lower did the trick. A similar view was able to be capture by mounting the suction cup on the rear windshield. With the camera facing forward I was able to get more of the interior and using a zoom lens allowed for narrowing down the field of view. Keep in mind that in vehicles with panoramic glass roofs, you would be able to get even more mounting options for such shots. A side shot of the driver or one of the passengers, can be easily captured with the suction cup mounted on the side windows. In those cases also you can utilize zooms for framing according to your preference. I tried some extreme closeups that could easily fit an intense scene. Other shots of the driver with the camera mounted on the windshield can be easily executed. My favorite was a bit to the side so I could avoid using super wide lenses that make faces to look unnatural due to their wide field of view. One of the last interior shots I was aiming for was kind of an over the shoulder shot of the driver. It was a bit tricky to setup on the rear side window but it turned out great. You should consider that working solo, will take a lot of time setting up your camera for each shot, but it is what it is.
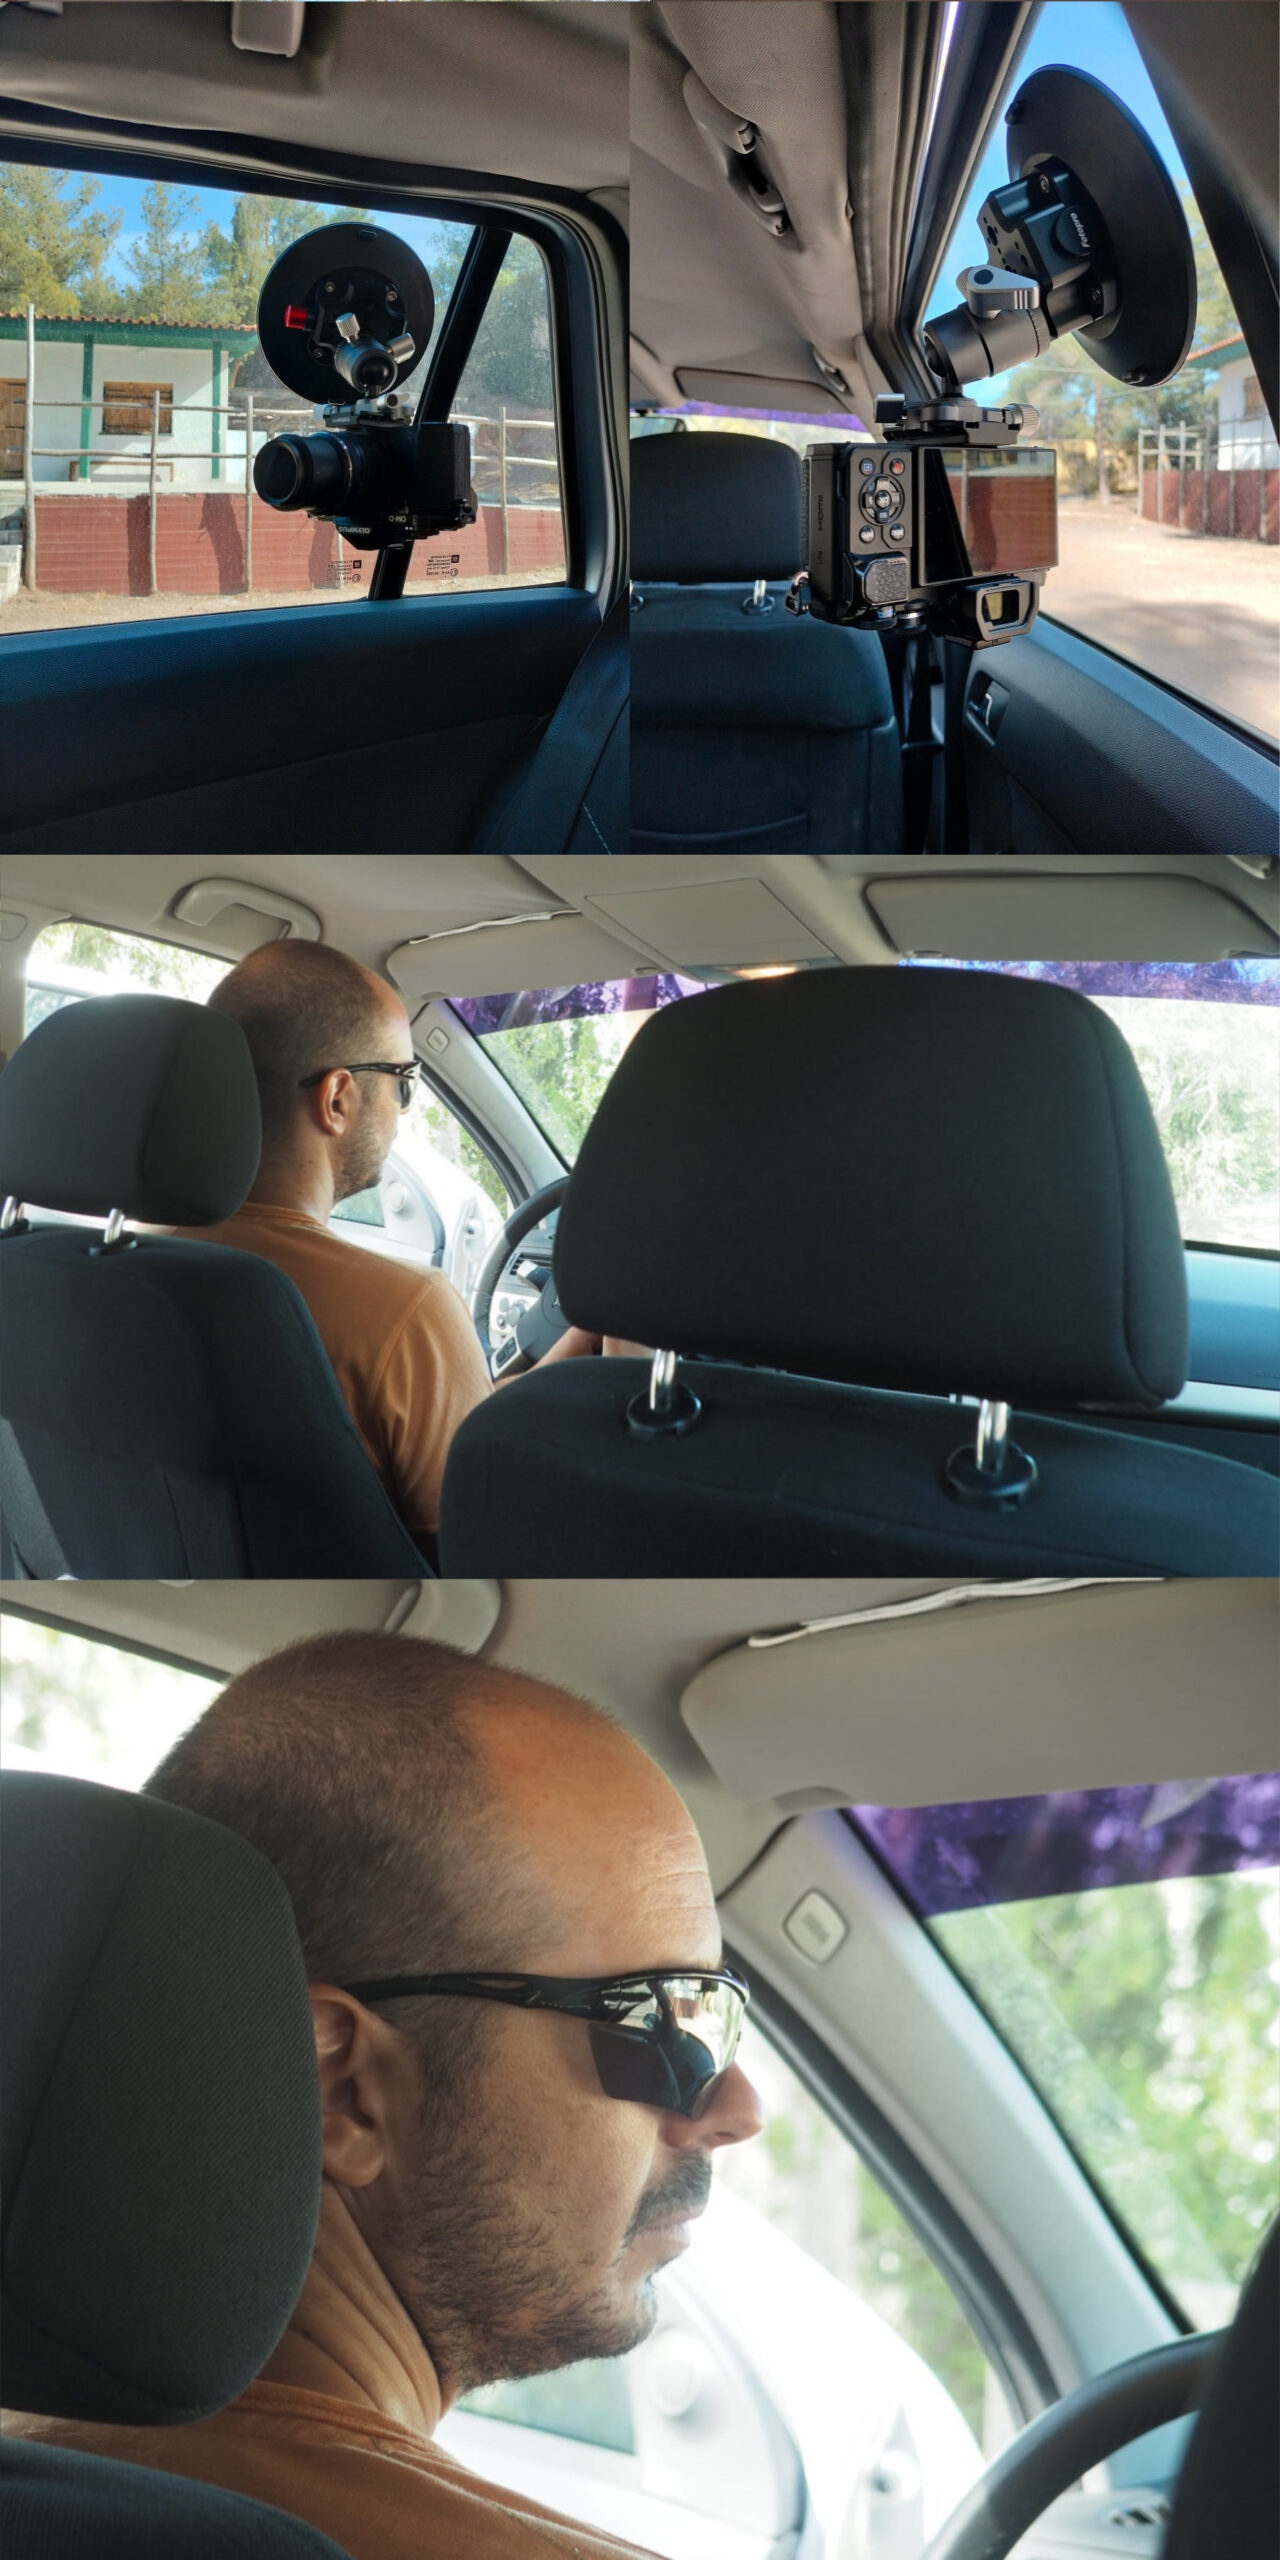
The setup for this over the shoulder type of shot.
When mounting the camera at the exterior of the car, I wanted to try a symmetrical shot from the roof of the car, just above the windshield and loved the way it looked. Another heads on shot from the hood to the windshield was easy to set up. This is where the CPL was necessary, as the reflection were too distracting and without it the shot would have looked way worse. One of the last exterior shots I was aiming for, is the cliché shot of the side of the car. While it can include a front tire of the car and create a dynamic scene when it turns right or left, this is not necessary. As long a they fit into your storytelling process, other creative shots like close to the ground, rear view or top down shots can be easily captured.
Using the suction cups for mounting other filming related gear was as easy as mounting a camera. Sound recorders were easily mounted with their screen facing me in order to have an easier operation and streamlined workflow. Lights were not needed in my experiments due to the lighting conditions, but I set up a night shot anyway. Having multiple suction cups was beneficial, as I was able to use them in conjunction, despite the fact that one single suction cup can easily support a camera, a sound recorder and a light at the same time. The thing is though, that you hardly want your light source to be so close to the camera, as off axis lighting compliments the scene more and creates a more three dimensional scene. In the night shot the light was placed outside the frame and the challenge was to avoid its reflection on the side window and the overall look to be as natural as possible. I think it turned out pretty nice if we consider the size of the light source and the absence of any diffusion.

This side shot setup provides the ability to capture both wide shots as well as close ups.
In case you are wondering, you could use the suction cups in other ways, more on the every day utility side. I found myself using the SS02 with a magic arm for mounting my phone and using it for navigation purposes. The fact that you have the ability to place it wherever you want, but also adjust it even further thanks to the magic arm is truly invaluable. Another way to use the suction cup is for entertainment purposed for the little ones in a vehicle. Whether it is a daily commute or a long travel, you can easily mount a smartphone or tablet, and let the child enjoy the ride while watching cartoons. Also if you don’t own a dashcam and want to record a ride with an action camera, you can do that with the SS02 easily.
A couple of observations I made and I think they might be of some value. When using the suction cups on a vertical surface, you should prefer to mount the ballhead or whatever accessory you are using on the lower part, as the applicable torque will be applied to a lower point. This means that the weight of the mounted gear will have a harder time to detach the suction cup, in case there are bumps and intense vibrations when filming.
Lastly I would like to experiment with the suction cups on a motorcycle but I didn’t had the chance, so this is going to be a whole other project for the future.

The of axis shot with a sound recorder mounted on a second suction cup.
Who is this for
The Fotopro suction cups are the only way to perform an interior or exterior video shoot without a dedicated camera operator, while being in a vehicle without heavily modifying it. As all glass elements can be used for attaching the suctions cups internally, the creative choices at your disposal are almost unlimited. As long as the production is kept at a medium level and no heavy fully rigged up cinema cameras are used, a lightweight camera setup will be secured in place without any problems. From a smartphone all the way to mirrorless cameras, the entire suction cup range has you covered in order to use the right one for the job.
I find the SS02 more suitable for tight spaces where the larger suction cups wouldn’t physically fit and also for lighter cameras and setups. The SS03 is the one size fits all solution of the three. It will easily accommodate a single larger camera or a lighter one with a couple of accessories. The SS04, being the larger of the bunch, will hold most cameras of the market in conjunction with accessories. Keep in mind you can never be too cautious with your equipment, especially on the exterior of a moving vehicle. So if you are in the search for a suction cup and you are between 2 different sizes, buy the larger one that will securely hold your gear.
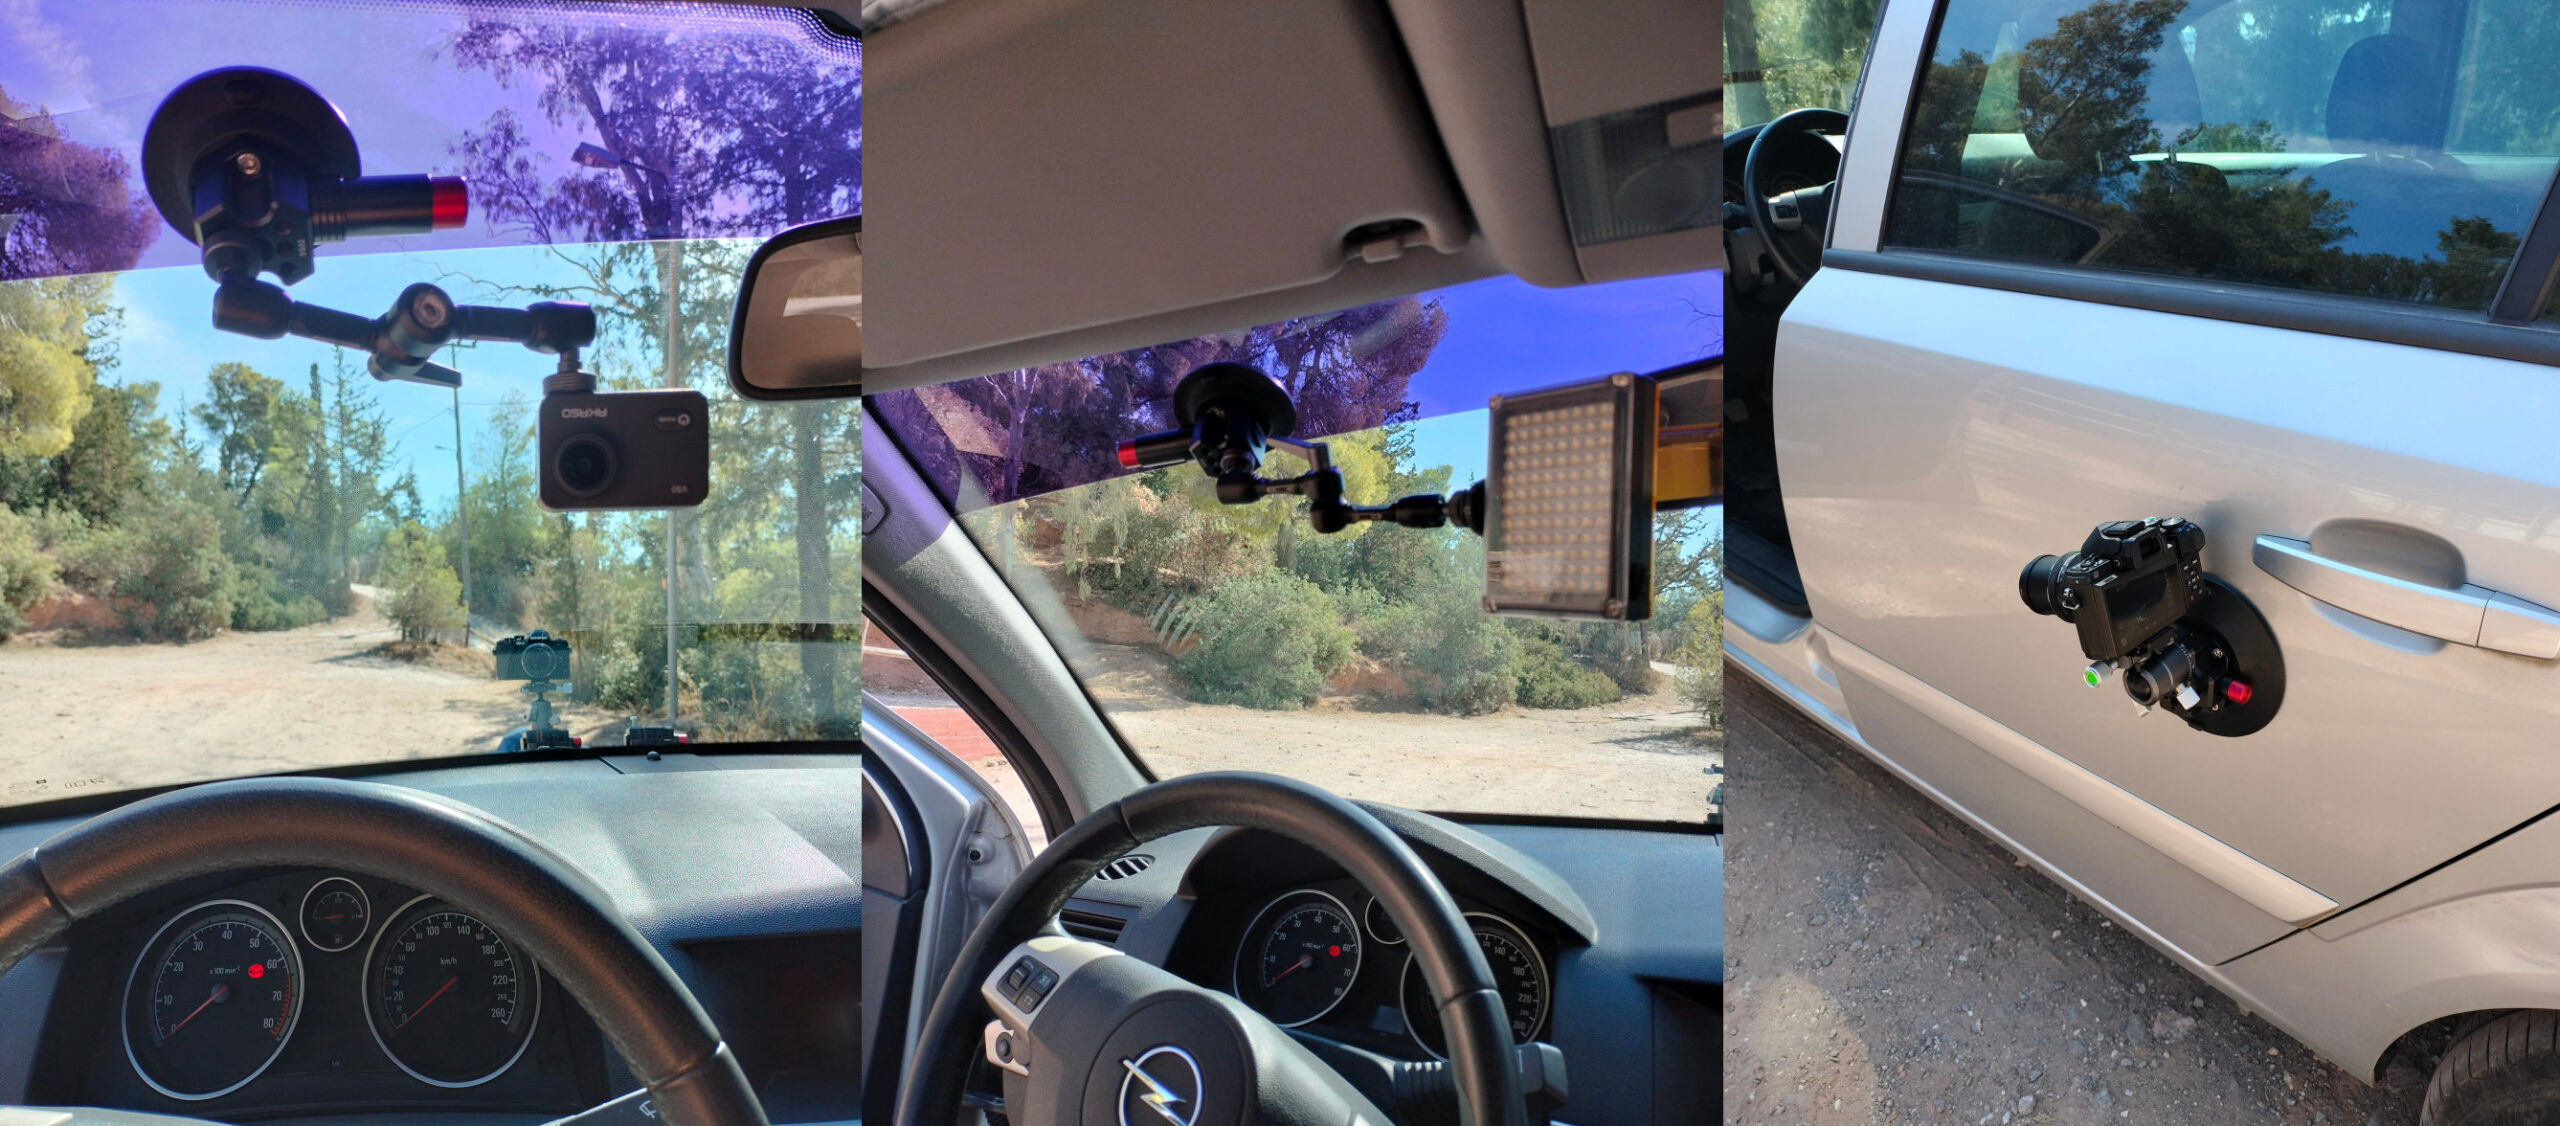
All kinds of accessories can easily be mounted on the suction cups like this fill light.
Conclusion
It has become very clear that Fotopro is not only a high quality tripod manufacturer, but a company with and ever expanding product range for the working professional in the photo and video industry. The accessories constantly released point that out and aim to make our lives easier and expand our shooting ability.
These suction cups are coming to complement even more, the accessories lineup and make life easier when there is a need to shoot some scenes in a vehicle. According to your camera setup you will find one that fits your need and also without breaking the bank.
For more information on the Fotopro suction cups, you can visit fotoprogear.com which is the official online shop with worldwide delivery. Also you can get an additional 10% off, with my personal DDTEN discount code at checkout which is applicable to all products throughout the online store. For more ease you can click the affiliate links below and you will be transferred directly to each product’s respective webpage.
https://www.fotoprogear.com/product/ss02-camera-suction-cup/ref/7/
https://www.fotoprogear.com/product/ss03-camera-suction-cup/ref/7/
https://www.fotoprogear.com/product/ss04-camera-suction-cup/ref/7/
